
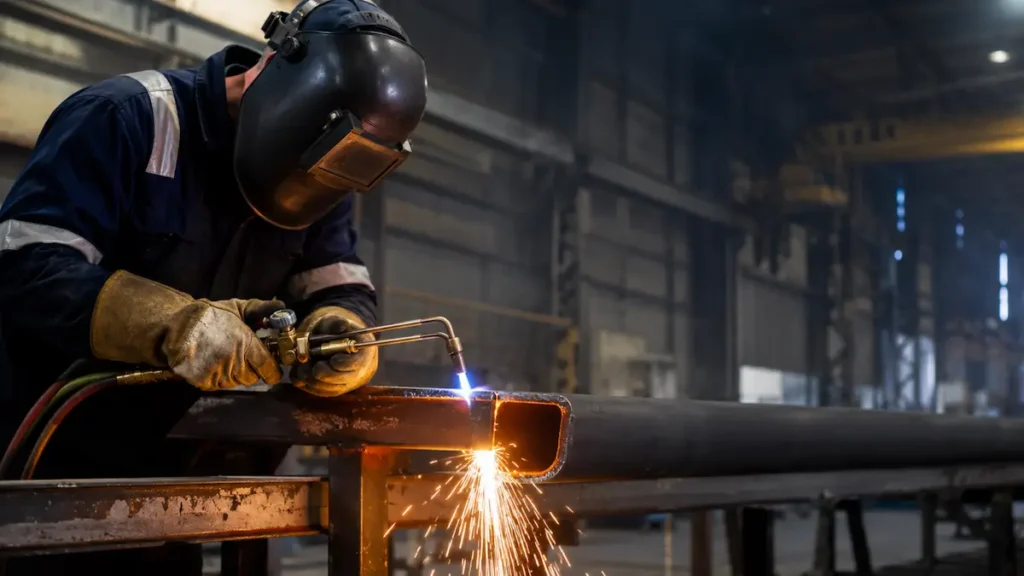
Oxy-Acetylene Cutting: Setup, Pressures, Tips and Safe Procedure
Oxy-acetylene cutting is still the most portable way to sever steel on Australian worksites, from fabrication shops and farm sheds to mine-site maintenance bays where mains power and plasma units are not always to hand. The process is simple in principle and unforgiving in practice: get the setup sequence, gas pressures or flame wrong and you waste gas, ruin the cut edge or create a real safety hazard. This guide walks through setting up a cutting torch correctly, the pressures to dial in for common steel thicknesses, the technique that produces a clean cut, and the shutdown steps too many operators skip.
How oxy-acetylene cutting works
Oxy-acetylene cutting is a chemical reaction, not melting. The torch first uses a mix of oxygen and acetylene to preheat a spot on the steel to its ignition temperature, around 900°C, a bright cherry red. The operator then opens a separate high-pressure oxygen jet down the centre of the cutting nozzle. That pure oxygen stream burns (oxidises) the hot steel and blows the resulting molten iron oxide out of the cut, leaving a narrow channel called the kerf.
Because the cut depends on the steel oxidising, the process works cleanly on carbon and low-alloy steels and does not work on metals that resist oxidation, such as aluminium, stainless steel and cast iron. For those, a different process is needed. Acetylene remains the preferred fuel gas for cutting because its flame is hotter and more focused than propane or natural gas, so it preheats faster and pierces plate more quickly.
Equipment you need to set up a cutting torch
A working oxy-acetylene cutting outfit is built from the same core kit as a welding set, with a cutting attachment or dedicated cutting torch on the front:
- An oxygen cylinder and an acetylene cylinder. A G-size cylinder suits a fixed workshop bench, while D or E sizes are the practical choice for portable and on-site work.
- A two-stage oxygen regulator (right-hand thread) and an acetylene regulator (red, left-hand thread with a notched nut).
- Flashback arrestors fitted at both the regulator and the torch ends, on both lines.
- Twin welding hose colour-coded to AS 1335 (green for oxygen, red for acetylene).
- A cutting torch, or a torch handle fitted with a cutting attachment, plus a cutting nozzle sized for the job.
- A flint or friction striker. Never light the torch with a match, lighter or any open flame held in the hand.
- Personal protective equipment: tinted goggles or a face shield (shade 5 minimum), leather gloves, a flame-resistant apron and sturdy footwear, plus a suitable fire extinguisher within reach.
Pacific Gas supplies the oxygen and acetylene, not the torches, regulators or consumables, which belong with a specialist welding equipment supplier.
Setting up the torch step by step
Most cutting faults and most accidents trace back to a rushed setup. Work through the sequence the same way every time.
1. Before you start, check that both regulator pressure-adjusting screws are wound fully out (closed) so no gas flows when you crack the cylinder valves. Confirm the cylinders are secured upright and the acetylene cylinder has stood upright for at least 30 minutes if it was recently transported on its side.
2. Stand to the side of each regulator, not in front of the gauge face, and open the oxygen cylinder valve slowly and fully. Open the acetylene cylinder valve slowly, no more than three-quarters of a turn, so it can be shut quickly in an emergency. Leave the acetylene key on the valve.
3. Set the delivery pressures. Wind in the oxygen regulator to the figure your nozzle and metal thickness call for, then set the acetylene regulator. Acetylene delivery pressure must never exceed 100 kPa (15 psi); above that, acetylene becomes unstable and can decompose. For cutting, you will sit well below that ceiling.
4. Purge each line one at a time. Open the oxygen valve on the torch briefly to clear the hose, then close it; do the same for the fuel line. This removes any gas mix sitting in the hoses before you light up.
5. Leak-test with soapy water on every connection, cylinder valve, regulator and hose joint whenever you change a cylinder or suspect a leak. Bubbles mean a leak; fix it before lighting. Never test for a leak with a flame.
6. Light the torch. Open the acetylene valve on the torch slightly and ignite it with the striker, then open the oxygen preheat valve and adjust to a neutral flame: equal-length inner cones with no excess acetylene feather and no harsh roar. For cutting, a slightly oxidising flame is set once the cutting oxygen lever is pressed, so set a clean neutral preheat first.
Recommended cutting pressures by metal thickness
Cutting pressures vary with nozzle size and manufacturer, so the numbers stamped on the nozzle chart always take priority. As a starting reference for common mild-steel thicknesses, Pacific Gas publishes the following working pressures:
- Up to 6 mm: oxygen 138 to 172 kPa, acetylene 21 to 34 kPa.
- 6 to 12 mm: oxygen 172 to 207 kPa, acetylene 28 to 41 kPa.
- 12 to 25 mm: oxygen 207 to 276 kPa, acetylene 34 to 48 kPa.
Two points matter more than the exact figure. First, the cutting oxygen does the work, so as the plate gets thicker you raise the oxygen pressure and step up to a larger nozzle rather than just turning up the gas on a small one. Second, acetylene stays low across the whole range and never approaches the 100 kPa limit; if you find yourself pushing acetylene high to get a result, the nozzle is too small or the preheat is wrong.
Choosing the right cutting nozzle
The cutting nozzle, not the torch, sets how thick a plate you can sever and how clean the edge will be. Nozzles are sized by the diameter of the central oxygen orifice: a small orifice for thin sheet, a larger one for heavy plate. Matching the nozzle to the work is what keeps the kerf narrow and the edge square.
Use the size chart from the nozzle manufacturer rather than guessing, because seat designs and numbering differ between brands. The principle is consistent: an undersized nozzle on thick plate starves the cut of oxygen and leaves a ragged, slag-welded edge, while an oversized nozzle on thin sheet melts and distorts it. Keep a small range of nozzle sizes on hand and clean the orifice with the correct tip cleaner if the flame goes lopsided.
Preparing the workpiece and workspace
A few minutes of preparation saves gas and rework. Mark the cut line clearly with soapstone so you have something to track, and where edge quality matters, allow for the kerf width by cutting on the waste side of the line. Support the work so the offcut cannot pinch the cut closed or drop onto your legs or the hoses as it falls; a pair of firebricks or a cutting bench keeps the underside clear so slag can blow through.
Clean heavy mill scale, rust, paint or oil off the cut line first. Surface coatings slow the preheat, throw extra fume and can spit, and paint or galvanising gives off hazardous fume when burned. Check what is on the other side of the plate and below it, clear anything flammable from the spark path, and make sure the space is well ventilated before you light up.
Cutting technique and practical tips
With the torch set up and the nozzle matched, technique decides cut quality.
- Starting the cut. To cut in from an edge, hold the preheat cones just clear of the top edge until that spot glows cherry red, then press the cutting oxygen lever fully and move off. To start a cut in the middle of a plate (piercing), preheat a spot, then raise the nozzle slightly as you press the oxygen lever so blow-back does not foul the tip, and lower it once the jet has punched through.
- Travel speed. Move at the speed that keeps a steady shower of sparks travelling roughly straight down through the plate. Too slow and the cut widens, the edge melts and slag fuses to the underside. Too fast and the oxygen jet lags, the cut loses depth and you lose the cut entirely.
- Standoff and angle. Keep the nozzle square to the plate and the inner cones a consistent few millimetres above the surface. A wandering standoff is the most common cause of a wavy, tapered edge.
- Reading the cut. Clean vertical drag lines on the cut face mean the speed and pressure are matched. Drag lines that trail backwards mean you are moving too fast or the oxygen is too low; a heavy, irregular edge with adhering slag usually means too slow, too little oxygen, or a dirty nozzle.
For thinner material a steady hand and a smaller nozzle do the job; for repetitive straight cuts a simple roller guide or straight-edge improves consistency far more than trying to freehand a long line. Bevel cuts for weld preparation are made the same way, with the torch held at the required angle to the plate rather than square; a guide bar is worth the setup time when the bevel has to be consistent along a long edge.
Shutting down the torch safely
Shutting down in the right order clears the lines and prevents flashback on the next light-up. It takes under a minute.
1. Close the torch acetylene (fuel) valve first to put the flame out, then close the torch oxygen valve.
2. Close both cylinder valves.
3. Open the torch oxygen valve to release the pressure trapped in the hose and regulator, then wind the oxygen regulator screw out until it is loose. Close the torch valve.
4. Repeat for the fuel side: open the torch acetylene valve to bleed the line, wind the acetylene regulator out, then close the torch valve.
5. Check both gauges read zero, coil the hoses and store the set with the acetylene cylinder upright.
Bleeding both lines back to zero is the step most often skipped. Leaving pressure in the system stresses the regulator diaphragms and leaves a charged fuel line, which is exactly the condition that feeds a flashback.
Troubleshooting cut quality
- Ragged top edge with melted, rounded corners: preheat too long or flame too oxidising. Move off the preheat sooner once the steel glows.
- Slag sticking to the underside: travel speed too slow or cutting oxygen too low. Speed up or raise the oxygen pressure and confirm the nozzle is the right size.
- Cut starts then stops: oxygen pressure too low for the thickness, or the nozzle orifice is partly blocked. Clean the nozzle and step the oxygen up.
- Wide, tapered kerf: nozzle too large for the plate or standoff too high. Drop a nozzle size and hold a consistent height.
- Flame keeps popping or backfiring: nozzle overheated or too close to the work, loose connections, or pressures set wrong. Stop, let the nozzle cool, recheck the setup.
Safety essentials for cutting
Cutting throws sparks, molten metal and fume, and uses a fuel gas that demands respect.
- Fit flashback arrestors at both ends of both lines, as required under AS 4603, and replace any that have operated.
- Keep acetylene delivery pressure under 100 kPa at all times.
- Always store and use acetylene cylinders upright, and follow AS 4332 for the storage and handling of cylinders.
- Clear the area of anything flammable, cut in a well-ventilated space, and keep a fire extinguisher within reach. Sparks travel several metres and smoulder.
- On heavy industrial and mining equipment, watch for sealed cavities, hydraulic lines and residues; cutting into a closed or contaminated section can trap heat or ignite trapped vapour.
- Wear shade 5 (or darker) eye protection, leather gloves and flame-resistant clothing, and never use oil or grease near oxygen fittings.
Frequently asked questions
What is the difference between oxy-acetylene cutting and welding?
Welding fuses two pieces of metal together using the flame as the heat source. Cutting uses the flame only to preheat the steel, then a separate high-pressure oxygen jet burns through it. The same torch handle often does both with a different attachment.
Can oxy-acetylene cut stainless steel or aluminium?
No. The process relies on the steel oxidising in the oxygen jet, and stainless steel, aluminium and cast iron resist that reaction. Standard oxy-acetylene cutting is for carbon and low-alloy steels only.
How thick a steel can an oxy-acetylene torch cut?
With the right nozzle and oxygen pressure, a hand torch comfortably cuts plate well beyond 25 mm and into the hundreds of millimetres on heavy work. Past the practical limit of a torch, an oxygen lance is used for very thick sections.
Why must acetylene pressure stay below 100 kPa?
Above roughly 100 kPa (15 psi), acetylene becomes chemically unstable and can decompose on its own, even without oxygen present. Keeping delivery pressure under that ceiling is the single most important fuel-gas safety rule. Cutting pressures sit comfortably below it.
What cylinder size should I use for cutting?
A G-size cylinder gives the longest run time for fixed workshop use. For portable and on-site cutting, D and E sizes balance run time against weight. Choosing the right cylinder size comes down to how much cutting you do between exchanges.
Is oxy-acetylene cutting still worth it compared with plasma?
For thick steel, off-grid work and portability, oxy-acetylene is hard to beat: it needs no mains power and cuts heavy plate that a small plasma unit cannot. Plasma is faster and cleaner on thin sheet and on metals that do not oxidise. Many shops keep both and pick the tool to suit the job.
How long will an oxygen and acetylene cylinder last?
Run time depends on nozzle size, cutting time and pressures rather than a fixed figure, because oxygen consumption climbs steeply with plate thickness. The cutting oxygen is consumed far faster than the preheat acetylene, so oxygen is usually the cylinder you exchange first. For steady production work, a G-size pair reduces how often you swap cylinders.
Oxygen and acetylene supply from Pacific Gas
Pacific Gas supplies the industrial oxygen and acetylene that oxy-acetylene cutting runs on, in cylinders through a network of local distributors across Australia. Cylinders are available on both rental and customer-owned terms, swapped empty-for-full much like a BBQ gas bottle, so you exchange a spent cylinder for a full one at a participating location rather than waiting for a refill. For brazing work, see our guide to acetylene for cutting and brazing, and for the matched fuel side, our oxy-acetylene welding guide covers flame settings in detail. To set up reliable gas supply for your workshop or worksite, find a local distributor or contact Pacific Gas.


